In the Kitchen: Chocolate Pudding (1956)

Dear Constant Reader,

This recipe came from a Baker’s Chocolate recipe pamphlet from 1956. Baker’s Chocolate used to be made just down the road from The Manor, so I was delighted at the local connection.

Although there are all sorts of fun and interesting chocolate recipes, I was looking for something I could scale down and that I had everything already. I decided on Chocolate Pudding. Easy and simple.

Untitled
Start by combining sugar, cornstarch, and salt.

The original recipe called for flour to thicken the pudding, but I know from experience that it tends to have a “floury” taste and can be difficult to incorporate smoothly. I used cornstarch instead. Rice flour would probably also work as a thickener

Add milk and stir to combine. Obviously you’re supposed to use real milk, but almond milk works perfectly fine. If you’re using flour, mix really well to keep it from being lumpy. Add the unsweetened chocolate and place over boiling water.

Baker’s unsweetened chocolate used to come in individually wrapped one-ounce squares and many recipes call for squares of chocolate. Recently Baker’s switched to selling the chocolate as a bar with half-ounce squares. Just be aware.

Chopping the chocolate before adding it makes it melt faster and more evenly. It would have taken so much longer with the whole one-ounce squares. As it was I broke the squares into quarter-ounce pieces and they didn’t melt very evenly.

Cook the pudding over boiling water until it starts to thicken. Then cook 10 minutes more. Add the vanilla and chill.

Serve with cream poured over. There were variations that were topped with flavored whipped cream (like with orange marmalade folded into it), but the basic recipe used plain cream. This was a new one to me, but it worked.

Untitled

Here’s the recipe, scaled for 4 servings.
Baker’s Chocolate Pudding, Miss Mina’s Way
1/2 cup sugar
3 tablespoons + 1 teaspoon corn starch
pinch salt
2 cups milk
2 ounces unsweetened chocolate, chopped
1/2 teaspoon vanilla

Combine sugar, corn starch, and salt in a medium saucepan that works as a double boiler. Also start water boiling in the bottom pan of the double boiler.

Add milk and mix well. Add the chocolate and place pan over the boiling water. Stir frequently until mixture thickens. Cook 10 minutes more, stirring occasionally. Remove from heat and add vanilla.

Pour into serving dish or individual bowls. Chill. Serve with cream poured over.

M2These writings and other creative projects are supported by my Patrons. Thank you so much! To become a Patron, go to my Patreon page.

Published in: on 24 May 2017 at 2:30 pm  Leave a Comment  
Tags: , , , , ,

In the Kitchen: Gold & Silver Cake (1934)

Dear Constant Reader,

I’ve been dying to try Gold and Silver Cake from one of my vintage recipe pamphlets, so I decided to make it as my birthday cake. The pamphlet in question, The Latest Cake Secrets, was pushing Swansdown cake flour and Baker’s coconut. I confess, I used Softasilk flour (more about the coconut below).

The cake itself is pretty simple, just a basic white cake. The flour does get sifted *four* times, once before measuring and then 3 times with salt and baking powder. This is added to creamed butter and sugar, alternating with milk. Flavor with some almond and orange extracts. Then fold in some stiffly beaten egg whites. Use a really big bowl. This recipe makes a lot of batter and you want room to gently incorporate the egg whites.

Now, it gets interesting. Take 1/3 of the batter and pour it into a cake pan. Then add beaten egg yolks to the remaining batter and divide it between 2 more pans. Thus you should (in theory) have a white layer and 2 yellow layers. Hence gold and silver.

This was the first time I baked a layer cake and used cake bands, which were totally successful. A cake band is a strip of cloth that is soaked in cold water and wrapped around the outside of the cake pan. It keeps the outside from cooking faster than the middle which is what makes the cake rise up in the center. While my layers weren’t perfectly flat, they were close enough that I didn’t feel the need to level them.

The color difference wasn’t as great as I might have hoped. Perhaps more egg yolks are needed.

The cake is then stacked gold-silver-gold with orange filling between the layers. The filling is made with sugar, water, orange juice, lemon juice, whole eggs, and cake flour cooked in a double boiler. Once it thickened, it’s finished with butter and orange zest. I didn’t love how it turned out. The flour lumped a lot and gave the filling a sort of floury flavor. I’d feared this might be the case, but I was determined to stick to the recipe as writ. Obviously the pamphlet was trying to put cake flour in as much as they could, but I’d use cornstarch next time. Also, the cake called for a double recipe of filling, which was way too much.

Then the cake gets frosted with a classic seven minute frosting. Cook (again in a double boiler) sugar, orange and lemon juices, and egg whites, beating constantly, for at least 7 minutes or until it’s thick and spreadable. Add some orange zest once it comes off the heat.

Sprinkle the top of the cake with a mixture of shredded coconut and orange zest. You want to do this right after the cake is frosted and the frosting is still gooey. The frosting dries to a crispy sugar shell and the topping would just slide off if you tried to add it at that point. The topping recipe called for Baker’s Southern Style Coconut, which they don’t make any more. It came in a can and was billed as being moist, like fresh coconut. I figured basic flaked coconut from the baking aisle was probably about the same thing. Packaging technology has moved on…

It was pretty successful for a first attempt. At least my guests liked it. I’m not giving you the recipe like I usually do, since I’m not satisfied with it and want to make some changes before I release it into the wild.

This was the cake:

M2

Published in: on 21 February 2017 at 3:20 pm  Leave a Comment  
Tags: , ,

To boile Chickins (1596)

Dear Constant Reader,

With the recent warm weather and soaking rain, my herb garden has had an autumn renaissance. The sorrel in particular (normally a spring plant) was looking remarkably healthy. Having a rare night off, I decided to cook a 16th century dish for dinner and use it up all the sorrel before the frost hits. Sorrel has a delightful lemony flavor and is most often used in soup in several Eastern European cuisines. It’s hard to find, which is why I grow it, and it’s impossible to preserve, so when you have it, use it.

From The Good Huswifes Iewell by Thomas Dawson (1596)

To boile Chickins
Strayne your broth into a pipkin, & put in your Chickins, and skumme them as cleane as you can, and put in a peece of butter, and a good deale of Sorell, and so let them boyle, and put in all manner of spices, and a lyttle veriuyce pycke, and a fewe Barberies, and cutte a Lemman in peeces, and scrape a little Suger uppon them, and laye them vppon the Chickins when you serue them vp, and lay soppes vpon the dish.

I started with two split chicken breasts. In the past I’ve used a game hen, but there weren’t any at the market. You want to use meat on the bone for the best flavor. I put the breasts in a small pot (aka a pipkin) in which they just fit and added chicken broth to cover, maybe two cups. No scumming needed. I omitted the butter, because modern chickens are fattier than their Elizabethan counterparts.

Then I gathered all the sorrel, which turned out to be about 3 oz, and chopped it finely. I added it to the bird & broth. Then I let it simmer until the chicken was cooked through.

Then I removed the chicken and I added 1 tsp. cinnamon and 1/2 tsp. ginger to the broth because those were the spices called for in “To dresse Chickins upon Sorrell sops” from A.W.’s A Book of Cookrye (1584) plus a little salt and pepper.

I’m unclear what “veriuyce pycke” means. Maggie Black, in her modernization, had something like “and a little verjuice. Pick a few barberries”, but that just didn’t seem right. I just ignored “pycke” for now. Verjuice is made from juice of unripe grapes and it’s a little like vinegar, but milder and with a hint of sweetness. I added 1/4 cup.

Next, the barberries. I had some dried barberries a friend gave me, but when I got the box out of the pantry, I discovered the berries, still tightly sealed up, were crawling with pantry moth larvae. Eeeewwww! Out to the trash those went in a hurry! Jerusalem: A Cookbook recommended substituting dried sour cherries or dried currants refreshed in lemon juice. However, references in Elinor Fettiplace’s Receipt Book and Food & Drink in Britain both suggested that barberries were used fresh. I thawed some of our sour cherries and threw them into the broth.

I let the broth cook down for a while and then put the chicken back in for a bit.

Soppes, also called sippets, are slices of stale bread that are put in the bottom of a dish to soak up the broth or juice or gravy. They’re a holdover from the medieval days of trenchers — a slab of sturdy bread used instead of a plate. You want the bread to be really hard or it will get gummy quickly.

I didn’t have any stale bread, so I cut some slices of Italian bread and toasted them. Those went in the bottom of the dish. I put one of the breasts and a few ladles of broth on top. Then I cut about half a lemon into thin slices, sprinkled them lightly with sugar and laid them all over the bird.

The dish is deliciously tart, what with the sorrel, “barberries”, verjuice, and lemon. The sprinkling of sugar makes a nice balance.

I’ll probably cut the remaining breast into pieces and serve it in the broth as soup.

This recipe is a little rougher than most as I usually wing it, depending on how much sorrel is growing and how much broth it takes to cover the meat, and I didn’t time anything. Consider everything approximate and do as you see fit. That’s the beauty of historic recipes.

Boiled Chickin
1 1/2 pounds chicken on the bone
2 cups chicken broth (or enough to cover chicken)
1 tablespoon butter (optional)
3 ounces sorrel, chopped
1/2 cup sour cherries (or 1/4 cup dried barberries refreshed in water or 1/4 currents refreshed in lemon juice)
1 teaspoon cinnamon
1/2 teaspoon ginger
Salt & pepper
1/4 cup verjuice
1 lemon
Sugar
Slices of stale bread

Simmer chicken and sorrel in broth until chicken is done (the time will depend on the size and cut of your meat). Remove chicken. Add fruit, spices, and verjuice. Simmer until flavors combine and broth reduces somewhat. Add the chicken back into the broth to warm it up.

Place slices of stale or toasted bread with the crusts trimmed in a dish. Put the chicken on top and pour some of the broth over. Slice a lemon thinly and garnish chicken. Sprinkle some sugar on the lemon slices. Serve immediately.

M2

Published in: on 2 November 2016 at 1:59 pm  Leave a Comment  
Tags: , ,

In the Kitchen: Spritzen (1788)

Dear Constant Reader,

Let us return to my kitchen for an 18th century treat. At this time the British monarchs were still basically German, so German cuisine had intergrated itself into English cookbooks. “Spritzen” is the German word for “splash”, “squirt”, or “spray”. These days it’s mostly used for a kind of cookie that is squeezed out of a press. I’m not sure how the name applies to these pastries.

From The Lady’s Complete Guide by Mary Cole (1788)

Spritzen
Mix two spoonfuls of fine flour with two eggs well beat, half a pint of cream or milk and two ounces of melted butter; stir it all well together, and add a little salt and nutmeg. Put them in tea-cups, or little deep tin moulds, half full, and bake them a quarter of an hour in a quick oven; but let it be hot enough to colour them and top and bottom. Turn them into a dish, and strew powder sugar over them.

As we learned from previous recipes, a good rule of thumb for pre-20th century recipes is to cut the number of eggs in half. Everything else seems pretty straight forward except the quantity of flour. How big was a spoonful? Karen Hess, in her excellently researched book Martha Washington’s Booke of Cookery, suggests that a spoonful in the later 17th century was equivalent to two of our tablespoons. I decided that it was probably still the case by the time this recipe came around.

I beat the hell out of the egg, since that’s the only rising agent. Added the flour, cream (since I had some from a different cooking experiment), butter, salt, and grated in some nutmeg. I used a standard size muffin tin (I’m pretty sure I greased it) and filled 8 cups.

A “quick oven” is about 375-400F. I baked the spritzen for 22 minutes at 400F.

They puffed up beautifully in the oven, like popovers, but fell completely before I could get them out of the pan. I sprinkled them with a little granulated sugar. If I’d been really authentic I would gave ground it up in my mortar, since “powder sugar” was sugar that was ground fine. Modern powdered sugar isn’t the same and usually has cornstarch added.

Despite being nicely browned and crispy on top and bottom, they were quite custardy in the middle. And very delicious. I’m not sure how well they keep, because they were gone before they even had a chance to cool.


Spritzen
1 egg
1/4 cup flour
1 cup light cream or milk
4 Tablespoons butter, melted
pinch of salt
1/4 teaspoon nutmeg

Beat egg very well and stir in flour. Mix in liquid ingredients and then seasonings. Pour batter into greased muffin tins, about 1/2 full. Bake at 400F until puffed and brown, 15-20 minutes. Immediately sprinkle with sugar and remove from tin. Serve hot.

Makes about 8.

M2

Published in: on 5 October 2016 at 3:54 pm  Leave a Comment  
Tags: , ,

In the Kitchen: Peach Ice Water (1885)

Dear Constant Reader,

It’s starting to cool off a bit, but we had some terribly muggy days this summer. I recommend this delightful Victorian ice recipe to counteract such misery. It’s made with (no surprise from the name) water rather than a cream base. I think it’s more refreshing than ice cream on a really hot & humid day.

From The Book of Ices by Agnes Marshall (1885):

Peach Ice Water
Peel 6 good peaches, and crack the stones, and remove the kernels, which must be pounded; put in a stewpan with 1 pint of water, 4 ounces of sugar, and juice of 1 lemon, cook the fruit for 15 minutes, then tammy, and add a wineglassful of noyeau and 1 glass of orange flower water, a little carmine. Freeze.

Untitled

I assumed that Victorian peaches were smaller than modern ones and halved the amount. This turned out to make the right amount for my ice cream freezer, so hurrah for me. It was a bit of a challenge to acquire peaches in the first place as the crop in the northeast this year suffered badly from our weird winter and the farmers’ markets have been lacking.

The ground peach kernels are used to give the ice an almond flavor. Rather than playing games with cyanide (this small an amount is probably safe, but still…), I used a splash of almond extract instead.

I know the picture shows a fake plastic lemon, but that’s because I took it after the fact and I had used my stock of fresh lemons. Someday I’ll remember to take the ingredient picture first.

A tammy is a fine hair sieve that you would rub the cooked peaches through. Because I don’t have servants, I used an immersion blender and resigned myself to a less than perfectly silky smooth puree.

My research showed that a Victorian wineglass measure was about 2 fluid ounces. Noyeau is a almond-flavored liqueur; I used amaretto. Orange flower water, like its cousin rose water, is very potent. I recommend using very little.

Carmine is a red food coloring made from cochineal, an insect. I actually have some cochineal in its raw form, but that seemed excessively authentic. I considered adding a little red food coloring, but I was out (blue and green coloring, yes, but no red or yellow. Why?). Besides, the puree had a lovely peachy color in its natural state.

If you don’t have an ice cream freezer, there are ways to fake one. Or you can treat this like a granita and freeze for a couple of hours in a shallow pan, stirring every half hour to break up the ice crystals.

Peach Ice

Peach Ice Water
1 lb. peaches
2 cups water
1/2 heaping cup sugar
Juice of 1 lemon
1/2 teaspoon almond extract
1/4 cup amaretto
1 teaspoon orange flower water
A few drops of red food coloring (optional)

To peel the peaches, dunk them into boiling water for a few seconds and then into ice water. The skins will come right off. Halve the peaches and take out the pits.

Cook the peaches with the water, sugar, and lemon juice for 15 minutes. Remove from the heat and puree.

Add almond extract, amaretto, and orange flower water. Let cool completely.

Pour into ice cream freezer and follow the instructions.

M2

Published in: on 24 August 2016 at 12:04 pm  Leave a Comment  
Tags: , , ,

In the Kitchen: Jumbles (1597)

Dear Constant Reader,

In the previous historic recipe, I mentioned jumbles, a kind of Elizabethan cookie. Some think the name comes from the Latin word for “twin”, gemellus, which hints that they were shaped with two loops. Here’s how you make them.

From The second part of the good hus-wiues iewell by Thomas Dawson (1597).

To make Iombils a hundred
Take twenty Egges and put them in a pot, both the yolks & the white, beat them wel, then take a pound of beaten suger and put to them, and stirre them wel together, then put to it a quarter of a peck of flower, and make a hard paste thereof; and then with Aniseede moulde it well, and make it in little rowles, beeing long, and tye them in knots, and wet the ends in Rosewater, then put them in a pan of seething water, but euen in one waum, then take them out with a Skimmer and lay them in a cloth to drie, this being doon, lay them in a tart panne, the bottom beeing oyled, then put them into a temperat Ouen for one howre, turning them often in the Ouen.

Untitled

I didn’t need a hundred jumbles, so I cut the recipe way down. The first thing to note is that until the 20th century eggs were on the small size, so a good rule of thumb is to cut the number of eggs in half if you’re using standard supermarket eggs. A quarter of a peck of flour is about 3 1/2 pounds. Despite the whole wheat flour in the picture, I used white flour — it was in a less photogenic container.

Beat the eggs very well — they’re the only leavening in the dough. Add the sugar, then the flour and the anise seed. When I first made these many years ago, I used anise, which a lot of people (like Scratch) really don’t like. This time I used caraway. Not as historically accurate, but more likely to be eaten.

Then divide the dough up — I split it into 8 parts — and make it into long snakes. Tie them into knot-like shapes. I’ve done actual knots, but this time I twisted them into circles. Pretzel shapes would be okay too. The recipe says to wet the ends with rosewater and I’ve done that. I find it adds no discernible flavor, so I skipped it this time.

Now the fun part. Drop your jumbles into a pot of simmering water, a couple at a time. You don’t want to crowd them. They’ll sink to the bottom. After a couple of minutes, poke them with a spoon, so they don’t stick to the bottom. When they float, they’re done. Scoop them out of the water with a slotted spoon or similar and place the jumbles on a clean towel on top of a cooling rack.

After they’ve dried for a few minutes, put them on a greased cookie sheet (I use a silicone baking mat — I love those things) and bake at 350F for 30 minutes, turning them over half way through.

Why not bake for an hour, like the recipe says? Elizabethan ovens worked with retained heat — you’d build a fire in the oven and when the bricks were hot enough, you’d pull all the coals and stuff out, swab the oven floor all down with water (you don’t want ash on your bread plus it makes steam which contributes to a really nice crust), and put in the stuff that baked at the highest heat first and as the oven cooled you’d swap in the things that needed a lower temperature. Trying to mimic the gradually falling temperatures is a pain, so I bake for less time at a constant temperature.

Let the jumbles cool on a rack. They will be hard on the outside (good for dipping!) and chewy on the inside, kind of like a tiny sweet bagel.

Untitled
2 eggs
1/2 cup sugar
1 tablespoon anise (or caraway) seed
2 cups flour

Beat eggs very well. Blend in sugar. Add seeds and flour. You should have a stiff dough. Divide into 8 pieces. Roll each piece into a rope and tie into knots or twist into rings.

Carefully place each jumble in a pot of simmering water. After a moment or two, nudge them with a spoon so they don’t stick to the bottom. When they float, remove with a slotted spoon and allow to dry on a towel.

Place on a greased cookie sheet and bake in a preheated oven at 350F for 30 minutes, turning each jumble over after 15 minutes. Let cool on a rack.

M2

Published in: on 16 August 2016 at 1:51 pm  Leave a Comment  
Tags: , ,

In the Kitchen: Wine Chocolate (1726)

Dear Constant Reader,

For this foray into historic cooking, here’s something with ingredients most of you love — chocolate and booze!

This recipe comes from The Cooks and Confectioners Dictionary: or, the Accomplish’d Housewives Companion by John Nott (1726).

To make Wine Chocolate
Take a pint of Sherry, or a pint and half of red Port, four Ounces and a half of Chocolate, six Ounces of fine Sugar, and half an Ounce of white Starch, or fine Flour; mix, dissolve, and boil all these as before [previous recipe for “To Make Chocolate with Water” which “will be done in ten or twelve Minutes”]. But, if your Chocolate be with Sugar, take double the Quantity of Chocolate, and half the Quantity of Sugar; and so in all.

Untitled

After years of working with medieval recipes which are vague, to say the least, on quantities and cooking times, this recipe was positively simple! I cut all the ingredients down to one-third, which made two generous servings.

Just melt together port (or sherry, but I haven’t tried that version), unsweetened chocolate (you want a high-quality bar chocolate; cocoa powder is not the same thing), sugar, and rice flour (it incorporates better than wheat flour).

Reproduction chocolate pot from Colonial Williamsburg


In the 18th century, this drink would have been served in a special chocolate pot with a hole in the lid. A “mill” or wooden whisk would fit in the hole and the chocolate would be frothed before serving it by rubbing the mill between your palms. I don’t have a chocolate pot, but I do have a molinillo, which is used for making Mexican hot chocolate and is basically the same as a mill, just fancier. Despite my best efforts, I couldn’t get the mixture to froth at all. Oh well.

The wine chocolate is very rich, but not terribly sweet, and the starch makes it very thick. I couldn’t finish my cup, so I stashed the leftovers in the fridge and had it a couple of days later over ice cream. So decadent!

And here’s my version.

Untitled

Wine Chocolate a deux
1 cup ruby port (or about 2/3 cup of sherry)
1 1/2 oz. unsweetened chocolate, broken into pieces
2 oz. white sugar (about 1/4 cup)
1 1/2 teaspoons rice flour

Heat the port gently in a saucepan and add the chocolate and sugar. Stir until they dissolve. Stir in the rice flour and let the mixture simmer (not boil, despite what the original recipe says) for about 10 minutes, stirring from time to time. Froth with a mill, molinillo or whisk and then quickly pour into cups.

Serves 2 generously.

The item on the saucer is an Elizabethan Jumble. Perhaps that will be the next historic cookery post.

M2

Published in: on 10 August 2016 at 10:56 am  Leave a Comment  
Tags: , , ,

New Feature (sort of)

Dear Constant Reader,

You’ve probably figured out that I like making historic recipes. I’ve confined myself to writing about a select few early 20th century recipes here because I didn’t want to derail the whole burlesque/retro thing. However, I also explore recipes from other eras. In the past I’ve cooked from the Roman Empire to the Renaissance, with a particular love for the reign of Elizabeth I. Recently I took an on-line course (what I quaintly like to think of as a “correspondence course”) on British royal palaces and the cooking done there under various monarchs. Part of the coursework was cooking recipes from five reigns.

As a lark, I’d post pictures of the results to various social media. I noticed the pictures would get a lot of attention. I toyed with the idea of a separate blog for my historic cooking, but I didn’t want my loyal readers to have to split their attention, and besides, it’s all part & parcel of me.

So, I’ll be posting more recipes here from all different centuries. I promise this won’t become a food blog. I’ll still be writing about my burlesque adventures and reviewing books (I owe you so many reviews!) and posting Friday Tips. But there might be more content more often. And pictures. Everybody loves the pictures.

Just look for the tag #historiccookery. I’ll also be tagging posts with the decade, century, or era, as appropriate.

M2


Published in: on 9 August 2016 at 10:09 am  Leave a Comment  
Tags:

In the Kitchen: Walnut Tea Cake

Dear Constant Reader,

For the last several years at The Expo I’ve been hosting a tea party on Sunday afternoon. I love it, except for the fact that the hotel has to do the catering. I decided it was time to throw a party at Stately Babydoll Manor where I could make all the goodies.


And so I did. We had:
4 kinds of tea: peach oolong, green, rooibos, and blooming
served with sugar cubes and molded flavored sugars (thanks, RuffleCon!), milk (regular or cashew), lemon.
3 sandwiches: pear-blue cheese-walnut, classic cucumber, tomato with basil
2 breads: vegan English muffins, sour cherry scones
served with sour cherry jam and butter
3 pastries: walnut tea cake, lemon cookies with fondant & piped icing, vegan chocolate mini-cupcakes with chocolate glaze

When I posted a picture of the walnut cake on Facebook, I was asked how it was, but I baked it Thursday and I didn’t taste it until Saturday. The answer, quite good. It’s a little plain, but moist, nutty, and just a little sweet. Goes very nicely with a cup of tea (and I assume coffee, but I never touch the stuff).

The recipe came from Ida Allen Bailey’s book Luscious Luncheons and Tasty Teas which was probably published sometime between 1920 and 1930. Mrs. Bailey was a prolific cookbook author and sort of the Martha Stewart of her day. The book is one of four gorgeous volumes* that were designed to hang, calendar style, on the wall. There are menus for each week of the year with a corresponding recipe or two.

Here’s the recipe for those who asked:

Nut Tea Cake
1 1/2 tablespoons butter
1/3 teaspoon salt
1 egg beaten
3/4 cup sugar
3/4 cup milk
1 1/2 cup flour
3 teaspoons baking powder
1/2 cup finely chopped walnuts (I toasted them)
1/2 teaspoon cinnamon
1/3 cup granulated sugar

Cream butter & sugar, work in nuts, salt, egg, add milk. Sift together flour and baking powder, beat and transfer to medium-sized oiled dripping pan (I used a 9×9 glass baking pan). Sift 1/3 cup sugar mixed with cinnamon over. Bake at 375F for 30 minutes.

M2
*Delicious Dinners, Satisfying Salads, and Dainty Desserts. I’m on a quest for the two I don’t own.

Published in: on 13 June 2016 at 2:40 pm  Leave a Comment  
Tags: , , , ,

In the Kitchen: Ham Banana Rolls (1950)

Dear Constant Reader,

Back in November, I wrote of my quest to prove the vintage recipe testers at Buzzfeed wrong and of the results of my first experiment, Olive-Cheese “Porcupine”. At that very same party, I also made a ham and banana dish. I had to do this at a party, because I wanted the feedback from several palates but also because I hate bananas.

I didn’t actually use the same recipe as the Buzzfeed folks. I could tell that theirs was going to be disgusting no matter how good a cook I am, so I found one that was similar, to prove that the recipe was at fault, not the dish concept. I used the recipe for Ham Banana Rolls with Cheese Sauce from a Chiquita Banana’s Recipe Book from 1950 while they made Ham and Bananas Hollandaise from the McCall’s Great American Recipe Card Collection from 1973. I’ll explain as I go how the two diverged.


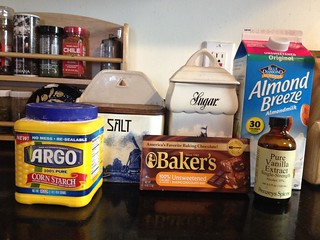
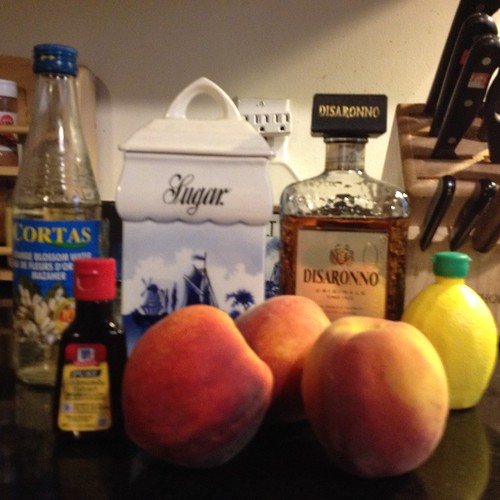
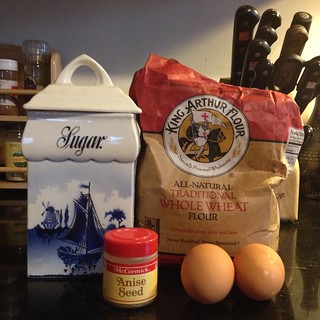
Start with bananas, ham, mustard, butter, milk, flour, shredded cheese

Both recipes begin about the same. Take slices of boiled ham and spread with mustard. My recipe left the amount of mustard up to the cook, while theirs specified a teaspoon and a half per slice. I just covered each slice with a thin, even coating. Diverging from both recipes, I used baked ham instead of boiled, because I was going to be making my lunch out of the left-over meat and I don’t like boiled ham. Does anyone? Also, back when they probably used French’s yellow, but I used a brown deli mustard.

I wrapped the bananas in the mustard-smeared ham and then brushed the bare banana tips with melted butter. Their recipe says to sprinkle the bananas with lemon juice to keep them from browning (not so necessary I thought) before wrapping the bananas. In both cases the wrapped bananas go into a greased, shallow baking dish.

Now things get very different. Their bananas are baked at 400F for 10 minutes. I baked my bananas at 350F for 30 minutes, but first I had to pour cheese sauce over them.

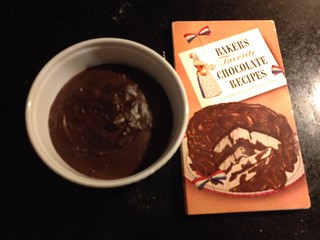
The cheese sauce is really easy. Make a roux with butter and flour, then add milk. Then add grated cheese and cook until it’s all smooth and hot. I confess, I used sharp cheddar instead of the called-for sharp American because I already had a bag of shredded cheddar for the porcupine (and I like it better).

Instead of baking the bananas in cheese sauce, they added hollandaise sauce after baking. You mix an envelope of hollandaise sauce mix with some water, cream, and lemon juice bring it to a boil. Pour over the bananas and bake 5 minutes more.


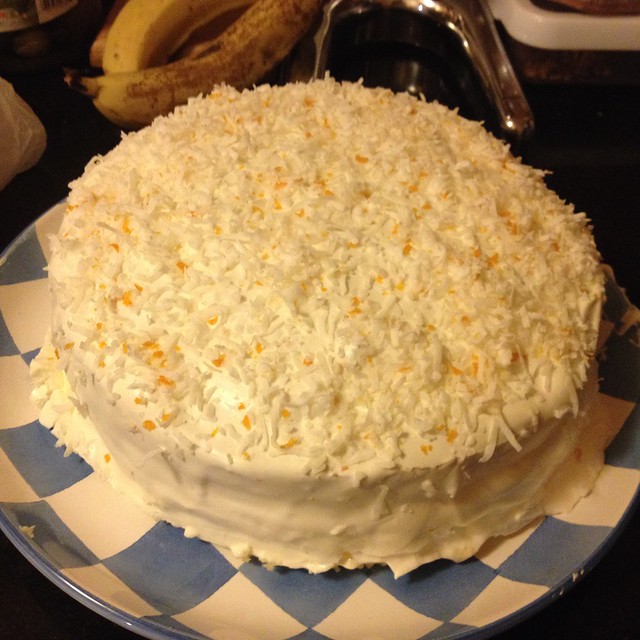
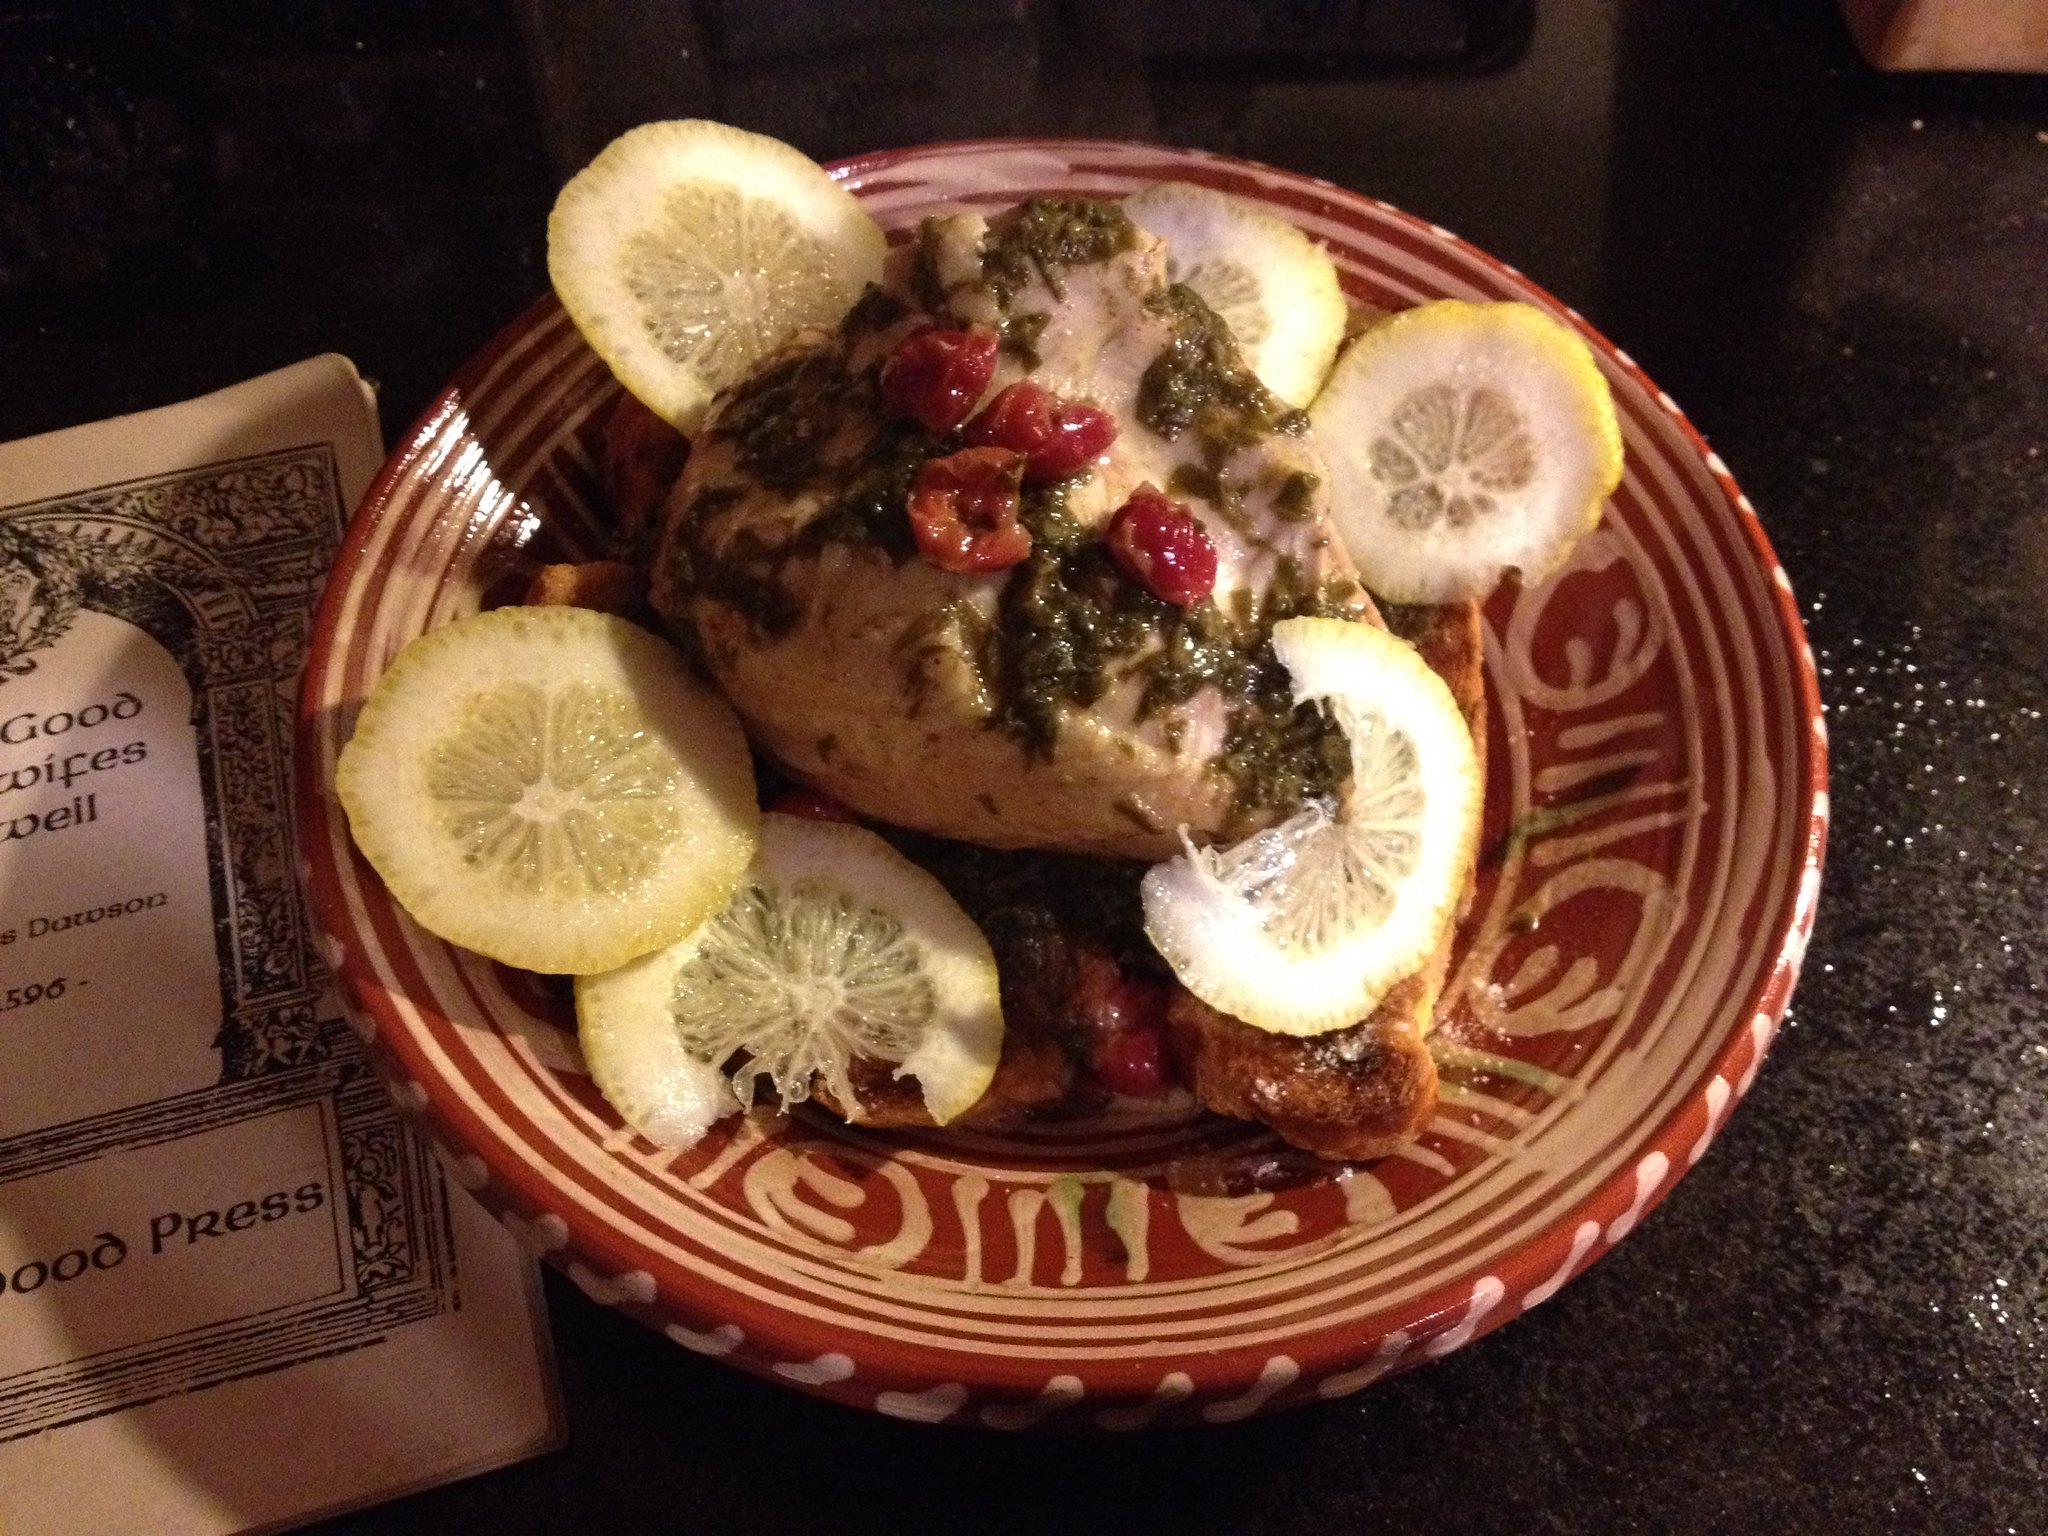
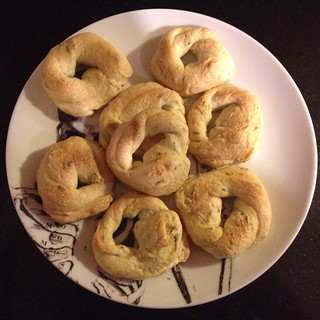
Here’s a gratuitous picture of the chef with the finished product. My taste-testers wrote “This is something I will get a craving for in the future. So great!” and “Awesome combo. Maybe need more salt or sharpness but this is one of those surprising flavor combos I’m glad I tried.” Those who liked bananas really liked the bananas. They were nice and creamy and had transformed from “hot banana” into something very tasty. Those who liked ham liked that too, especially the part that was above the cheese sauce, as it got crispy and brown. The part of the ham that was completely submerged in the sauce was not as good, since it never browned. The mustard flavor didn’t blend well with the ham & banana and was a touch assertive. The cheese sauce was a little bland.

If I were to make this again, I’d add some dry mustard to the cheese sauce (and salt & pepper), shred the ham and sprinkle it on top of the bananas, instead of wrapping it around. It doesn’t make for as nice, tidy, and midcentury a presentation, but it solves all the problems above while keeping the good parts.

I’m not surprised that the Buzzfeed version got low marks. To start I think they followed the recipe to the letter and used boiled ham and yellow mustard. Although their bananas cook at a higher temperature, it’s for half the time. They probably didn’t get creamy and slightly caramelized like mine did. Also, they were cooked without the sauce, just having been seasoned with lemon juice, which I think was totally unnecessary. I doubt the bananas were going to get oxidized in the short time from peel to pan. Perhaps the recipe was deliberately trying to amp the lemon flavor. Also, I think brushing the exposed banana bits with butter in my recipe improved the flavor and helped them brown.

Lastly, and most importantly, I think their hollandaise sauce was a loser from the get-go. Maybe it could have been okay with an actual freshly made hollandaise, but a mix was right out. I’m sure adding extra lemon juice to an already lemon-flavored sauce mix didn’t help. I’m not sure why the recipe creator thought ham, banana, and lemon was going to be delicious. I know hollandaise was pretty popular in the ’70s. I’m sure it was seen as more chic than a pedestrian cheese sauce.

It probably deserved the reviews of “It’s kind of like a banana split made a baby with a hot dog? Oh, it’s very sour!” and “Even the bits of banana that graciously don’t have slop on them have absorbed the scent of lemon and mustard in a very aggressive way.”

So don’t every try the 1973 version with hollandaise, but the 1950 version with cheese sauce is actually worth making.

banana rolls cooked
Here’s the original recipe, straight from Chiquita:

Ham Banana Rolls with Cheese Sauce
4 thin slices boiled ham
Prepared mustard
4 firm bananas (all yellow or slightly green-tipped)
1 1/2 Tablespoons melted butter or margarine
Cheese Sauce

Spread each slice of ham lightly with mustard.

Peel bananas. Wrap a slice of prepared ham around each banana. Brush tips of bananas with butter or margarine.

Place Ham Banana Rolls into a greased shallow baking dish, and pour Cheese Sauce over them. Bake in a moderate oven (350°F) 30 minutes, or until bananas are tender… easily pierced with a fork.

Serve hot with the Cheese Sauce from the baking dish.

Serves 4

Cheese Sauce
1 1/2 Tablespoon butter or margarine
1 1/2 Tablespoons flour
3/4 cup milk
1 1/2 cups grated sharp American cheese

Melt butter or margarine in saucepan; add flour and stir until smooth. Stir in milk slowly. Add cheese and cook, stirring constantly until sauce in smooth and thickened.
Makes about 1 cup sauce.

I’ll need to throw another party soon to try some of the other recipes.

M2These writings and other creative projects are supported by my Patrons. Thank you so much! To become a Patron, go to my Patreon page. Or you can just tip me if you liked this.

Published in: on 16 December 2015 at 3:21 pm  Comments (1)  
Tags: , , , ,