Friday Tip

Dear Constant Reader,

Happy Friday!

I’m trying something new. Inspired by some terrific burlesque instructors, like Bebe Bardeaux and Jo Weldon, I’ve decided to offer a monthly on-line workshop series. These are going to be mostly lecture classes, on topics like burlesque history and costuming. At least at first, because that’s what I’ve got ready to go. I’m working on some new classes and I’m open to suggestions. Our other faculty members may join the line-up too.

We’re going to kick it off with Getting Tight: A Guide to Corsetry on Tuesday, May 19. And as a little teaser, here’s your tip:

Remember to loosen the laces before you unfasten your corset.

Whether your corset has a traditional busk, a zipper, clasps, or something else, it’s going to be a lot easier and smoother when you release some of the pressure on that closure. Otherwise, it could be a struggle to unfasten, which is never fun, doesn’t look good, and there’s the possibility you’ll damage your corset.

For more corset information, join me on Zoom on May 19th!

M2These writings and other creative projects are supported by my 19 Patrons. Thank you so much! To become a Patron, go to my Patreon page.

Published in: on 17 April 2026 at 11:00 am  Leave a Comment  
Tags: ,

From the Distant Past

Dear Constant Reader,

I was cleaning up my sewing room (a Sisyphean task) and found these undies, which were made for a big group number in 2006. Martini Time undies

This was the finale for our “Centennial” show, celebrating a hundred years of the Boston Babydolls (one of our dates was April 1st — get it? We hadn’t even been performing as a troupe for a year at that point). We were supposed to perform it at Viva Las Vegas, but the organizers freaked out when we said there were 6 people in the act. Instead, we sent a trio (I wasn’t in it, alas). The following year (and I believe, ever after) the Viva burlesque competition was limited to solos.

When we were accepted to perform at Miss Exotic World that same year (the first year it was in Vegas), we decided the costumes needed an upgrade. We had all been wearing plain black panties, as I recall. Mine were from Victoria’s Secret, as the days of making my own were still in the future. Back then we very deliberately wore full-backed panties. My g-string era was yet to come.

I think it was Pinky Petite that took all the undies and added these cheeky martinis to the backs. As you can see, we were using sequins and glitter paint. So high end.  I thought they looked fabulous. Somewhere there’s a photo of the six of us leaning against a fence, butts out.

These days we would probably have martini glass-shaped g-strings, encrusted with rhinestones, and complimentary pasties, which I’m sure would read better and look more luxe. However, I’m kind of nostalgic for the days of sequins and hot glue and getting really creative with bargain basement finds. We were all fumbling our way through this burlesque thing, figuring stuff out as we went.

M2These writings and other creative projects are supported by my 19 Patrons. Thank you so much! To become a Patron, go to my Patreon page.

Published in: on 13 April 2026 at 10:58 am  Leave a Comment  
Tags:

Friday Tip

Dear Constant Reader,

Happy Friday! Here’s your tip!

If you can make your costumes adjustable, do so.

I was thinking about how commercial garments often have narrow serged seams, which don’t allow for a lot of leeway in alterations. If you want to be able to alter your garments, using a more generous seam allowance helps. But you can also use lacing, elastic, ties, overlapping panels, and other methods to make the garments adjustable without having to take them apart and resew them.

For example, here is a garter belt I made, based on a vintage example, with lacing over the hips.

Pink garter belt

The laces can be tightened or loosened, as need be, to make a perfect fit. And, I think it’s very pretty.

This tip was also inspired by a video Christina of Manuge et Toi shared of how she very cleverly added some adjustability into the bodice of one of her costume commissions. I aspire to be even a little bit as creative as she is…

M2These writings and other creative projects are supported by my 20 Patrons. Thank you so much! To become a Patron, go to my Patreon page.

Published in: on 27 March 2026 at 4:38 pm  Leave a Comment  
Tags: ,

More Pasties

Dear Constant Reader,

I’ve got a semi-regular show with an occasionally rotating cast of performers. One of them is relatively new to  burlesque and quite talented. However, I saw she was wearing stick-on pasties. You know, the flat kind that one might wear to be cheeky under a sheer-ish top. She deserved better. And I just happen to know someone who could make her a nice pair of professional pasties. That would be me.

Since she’d been wearing star-shaped stickers (I just can’t call them pasties), I decided to make five-pointed star pasties using one of Manuge et Toi’s templates from her huge library — you can buy any or all of them for yourself here. As I usually do, I started with buckram for the base and attached a layer of silver lamé. It would give her a nice shine if she wore them plain and also be a good base for rhinestones later. I wanted to her to be able decorate them in her own style.

At our last show, she arrived frazzled and then asked if anyone had pasties she could borrow because she forgot hers. “Well…” said I, and pulled out the pasties, “You can’t borrow these because I made them for you.” She almost cried. I love it when I can make a little difference for someone.

Here they are

Star pasties for Candy Crush

I can’t wait to see how she embellishes them!

M2These writings and other creative projects are supported by my 18 Patrons. Thank you so much! To become a Patron, go to my Patreon page. Or you can just tip me if you liked this.

Published in: on 5 February 2026 at 4:14 pm  Leave a Comment  
Tags: ,

Pastie Exchange

Dear Constant Reader,

As I’ve mentioned many times before, I’m a Patron of Manuge et Toi Design, which is an amazing resource for burlesque costuming. I’ve learned so much over the years! If you want to up your costuming game, whether for burlesque or not, I highly, highly recommend subscribing.  It is also a lovely and supportive community. This past autumn Christina organized a pastie exchange, pairing participants up.

I checked the IG account of my partner, Aurora Rocket, and saw she had a touch of creepiness in her style. I’d been dying to try making planchette pasties and she seemed like the perfect victim person. 

As is my usual style, I made the pasties with a buckram base and fused a tan satin on to it. I used the duller side of the satin for more of a wood effect.

The designs were done in jet and crystal (Looking Glass Gems), honey (LUX Austrian Crystal), and peridot (PriceLess Crystal) rhinestones. I considered covering the entire surface in honey stones, but I was afraid of losing the impact of the eyes if the entire surface was sparkly.

These pasties were a stretch for me, in terms of shape, size, and decoration. And, being a little intimidated by the challenge, I procrastinated a bit and then realized I was going to be losing six days right before the deadline because I was going to London (woe is me!). I still managed to get them in the mail exactly on time.

Christina organized a live unboxing party on Zoom, so none of us could open our packages until the appointed time. It was hard to wait! I was super-nervous for Aurora to open the box, especially after I had seen so many beautiful and creative pasties made by others. I  needn’t have feared, she seemed delighted.

And I’ve made you wait long enough — here they are!

Planchette pasties

And what did I receive in return? These gorgeous blood drops! You can’t really tell from my photo, but those rhinestones are immaculately set. It’s such a beautiful job. I believe I’m going to replace the bat pasties I wear for “Moon Over Bourbon Street” with these lovelies.

Thank you, Aurora and Christina, and all the other pastie makers for brightening up my December!

M2These writings and other creative projects are supported by my 18 Patrons. Thank you so much! To become a Patron, go to my Patreon page. Or you can just tip me if you liked this.

Published in: on 26 January 2026 at 12:15 pm  Leave a Comment  
Tags: ,

It’s Done!

Dear Constant Reader,

I enjoy a number of handcrafts, but my first love is counted cross-stitch. 

Last spring Sarah at Slightly Sinister created cross-stitch patterns for the emblems of each of guilds in the Slightly Sinister Academy of Crafts and gave the Secret Society first crack at them, before they were released to the greater Academy. I jumped right on the Hissenskratch* one. I did not know what I was getting into…

Although the color pallet is relatively limited and there are no blended threads or partial cross-stitches (I’m looking at you, Teresa Wentzler), it was still a challenge. The design is pretty large and there’s quite a bit of shading. I had a lot of fun with it, planning stitching strategies and celebrating little victories. It was my constant companion and I stitched whenever I had a free moment, at least a little almost every day. You have no idea how unusual this is for me — I’ve got cross-stitch pieces that have been sitting in the UFO box for years.

How long did it take? I didn’t track my time, which I think would have hindered my productivity, so I don’t know how many hours I spent on it. However, I took the first stitch on May 13, 2024 and the last on September 10, 2025.

Ta-da!Hissenskratch cross-stitch

If you want to see more of my embroidery, check out my Project Portfolio. It’s not complete by any stretch of the imagination, but I’m working on it.

Originally Sarah made the patterns only to the members of her Academy, but I think she’s going to offer them for sale. I’ll add the link if she does.

M2

*Hissenskratch is my guild. Are you shocked that I was put in the cat group?

These writings and other creative projects are supported by my 18 Patrons. Thank you so much! To become a Patron, go to my Patreon page. Or you can just tip me if you liked this.

Published in: on 29 September 2025 at 5:05 pm  Leave a Comment  
Tags: , ,

Halloween Under Bits

Dear Constant Reader,

This past Saturday was our first Halloween show. I may write about it in more detail later — this is just to show you my new shiny bits.

Last year, after a planned act failed to come together, I swapped in “Moon Over Bourbon Street”, a rather pretentious fan dance, a few days before the show. At the last minute, I realized I could reinforce the vampire theme with a pair of bat pasties. They were literally made the night before and, while they were cute, I wasn’t happy with them. They were too big and the minimal rhinestoning didn’t pop at all.

This year I planned ahead and made new bat pasties, using a template from Manuge et Toi.
Bat pasties
The rhinestones are mostly from Looking Glass Gems, with some black diamond Swarovskis Scratch had in his stash.

Next up, I needed a new g-string for “Satanic Panic” as the one I had been using was going to be appearing in “Bourbon Street”. I wanted it to be flame-themed to match the pasties* I had made for the act’s debut. I decided to challenge myself and make the g-string flame-shaped as well as colored.

Flame pasties & g-string

That g-string is heavy! I’m not sure I’ve ever stoned a garment other than pasties that solidly before. Fortunately, it stays in place pretty securely. I’m pretty pleased with how it came out. The photo really doesn’t do the colors justice, especially the shifting shades of the phoenix rhinestones (the orange-ish stones).

As with the bats, the majority of the rhinestones are from Looking Glass Gems, except the citrine on the pasties which are Swarovski.

While I was working on the g-string, and really feeling on a roll, I went to visit my parents. I wanted to keep working, but my bottle of glue was too big to take on the plane. I grabbed one of my TSA-compliant toiletry containers and dumped in a hefty glop of Jewel Bond. Rhinestoning on a plane is a bit challenging, but at least I (and probably my seatmate) was entertained.

M2These writings and other creative projects are supported by my 19 Patrons. Thank you so much! To become a Patron, go to my Patreon page. Or you can just tip me if you liked this.

*Although Manuge et Toi now has a flame pastie template, these pasties were made about a year before it was released. It would have made my life so much easier and my pastie design so much cleaner.

Published in: on 10 October 2024 at 3:35 pm  Leave a Comment  
Tags: , ,

New Costume

Dear Constant Reader,

When we were planning our summertime show, Queens of the Jiggle, I knew I wanted to perform “Too Darn Hot” with my new fans (seen here with my chief fan inspector). New fansAnd new fans deserve a new costume.

After some discussion and brainstorming, we decided on a body harness with removable fringe. This then morphed into a frame bra and fringe belt set instead. I wanted to use as much of our existing supplies as possible, so for the base, I used some silver over black elastic in the troupe stash. Not particularly flame or heat colored, but that’s fine.

I stood very still while Scratch draped and pinned the elastic into the bra structure, then I carefully wiggled out and did all the sewing. I was able to scavenge the bra hooks, rings, and sliders from an old bra. Huzzah!

The bottom band kept shifting, but I knew how to fix it — a little trick I learned from Christina Manuge — with plastic boning. But I didn’t have any. With time getting tight, Scratch cut some strips of clear rigid plastic and drilled teensy holes into them. I filed down the corners with an emery board and sewed them into place. Perfect!

I didn’t love the look of the elastic belt after the fringe was removed and Scratch didn’t like the action of removing the belt, so I decided to incorporate the fringe into my g-string. My first thought was to make a new strappy g-string, but I went for easy. I took an existing g-string, already rhinestoned, removed its elastic (which is very easy with the style of g-string I make — see my costume book!) and added the black and silver elastic.

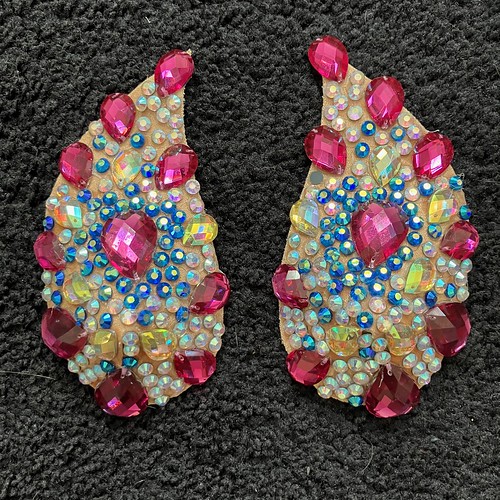
The pasties I had already, having made them for “Satanic Panic”, last summer.Flame pasties

That however, was the end of using what we had. I needed fringe and Scratch found the perfect stuff — yellow shading to red, just like my fans.

Once the fringe arrived I added snaps (those did come from my stash) and the costume was done! I proudly tried it out at rehearsal and discovered that the elastic was too stretchy. With the fans in my hands, I couldn’t get enough force to unsnap the fringe. Time was running out. What could I do?

Devastasia snowladyDevastasia suggested small magnets. She used them very successfully on her epic snowlady costume this past winter. (seen in rehearsal at right). Scratch ordered a whole bunch in various sizes and I got to work exchanging snaps for magnets. After a test run where I thought I had a clever idea, but physics beat me, I reconfigured the magnets. The fringe removal finally worked perfectly! Or so I thought.

The last item I had to buy was red and yellow rhinestones. Alas, the post office told me my package from Looking Glass Gems wasn’t going to arrive until after the show. So disappointing! But wait — they fortuitously came a day early and I spent part of Friday gluing stones onto the fringe and fans. Not as many as I would have liked, but at least I had some sparkle.

Once we arrived at Deacon Giles, I put the costume on and rehearsed the number. Only to discover that went I went up the front stairs to the stage, the movement dislodged the fringe from the magnets on the back of my g-string. Good to know, nothing I can do to fix it now; I’ll enter from the wings instead.

However, there are still a couple of steps up from the side of the stage, and despite climbing carefully, I still lost one of the hip swags as I was entering. Annoying. I think I’ve fixed the issue.

I’m pretty happy with how it turned out and I hope to have an opportunity to use this costume again soon!

And now that you’ve read all that, here’s your reward. Photos taken backstage by Devastasia

Costume front Costume back

I don’t love the front drape of the fringe on the g-string and I’ve since changed it.

Here’s an action shot from audience member (and fan dancer) Jenne alla Vodka:

IMG_5119

M2These writings and other creative projects are supported by my 20 Patrons. Thank you so much! To become a Patron, go to my Patreon page. Or you can just tip me if you liked this.

Published in: on 13 August 2024 at 9:53 pm  Leave a Comment  
Tags: ,

Burly Bundle: Gloves

Dear Constant Reader,

A couple of years ago I tried out the burlesque craft subscription Burly Bundle, so I could review it. I had fun, so I ordered the next couple of boxes before Misty closed the business.

Here’s the last one, which I completed first — gloves!

The kit came with the gloves, marabou trim, rhinestones, and everything needed to affix the decorations, even needle and thread and a little measuring tape. In the past, some kits included individual colors choices, but this one had only wine red gloves, as it goes with many color combinations, and black rhinestones. I approve of the choice.

I like the rhinestone pattern — I’m not great at designing patterns and often go with a random scatter. It took a while of careful counting over several stoning sessions, but that’s what Netflix is for.rhinestones

The main line of stones are ss16. That was fine. I work with that size all the time. The little side branches are ss10. A bit smaller than usual, but still fine. However, the radiating lines are ss6! I don’t usually work with such tiny stones –, but I do think the end result was worth the fiddliness.

Another thing I don’t usually work with is feather trim. however, adding the marabou was simplicity. It’s cut to my arm circumference and sewn at just four points arounds the cuff, so no real allowances for stretch had to be made. Also, it was hard enough sewing with all that fluff in just a few places. I would have not had much fun having to completely stitch it down, while also dealing with the stretch of the glove.

feathers

Since the gloves are “one size fits most”, Misty included some stretch lace and instructions to add a decorative gusset for a wider glove top. It sounded like an easy way to add some more visual interest and I was a little sorry that it wasn’t needed on my gloves.

Here’s the final result!

glove

I’ve still got two more boxes of projects in various states of progress. I shall report back.

M2These writings and other creative projects are supported by my 20 Patrons. Thank you so much! To become a Patron, go to my Patreon page. Or you can just tip me if you liked this.

Published in: on 10 July 2024 at 3:48 pm  Leave a Comment  
Tags: ,

Friday Tip

Dear Constant Reader,

Happy Friday! Have a tip!

IMG_2002When making non-symetrical pasties, and you want them to mirror each other, remember to flip your pattern over for the second one!

Yes, this was inspired by the pasties I’m making for our upcoming show. No, it’s not because I made that particular mistake. No, they’re not the pasties pictured — those are by Canova Studio. If you want to see the ones I’m making, you’ll have to get a ticket to Secrets of the Illuminaughty on July 8.

M2These writings and other creative projects are supported by my 19 Patrons. Thank you so much! To become a Patron, go to my Patreon page. Or you can just tip me if you liked this.

Published in: on 30 June 2023 at 2:19 pm  Leave a Comment  
Tags: , ,