Dear Constant Reader,
I can’t believe it’s taken me so long to review this glorious book. Scratch brought me back a freshly-released copy from the Burlesque Hall of Fame Weekend in 2019, so it’s recently celebrated its third birthday.
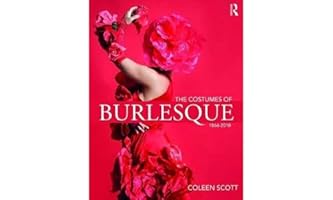 The Costumes of Burlesque 1866-2018 by Coleen Scott, 2019.
Coleen Scott (aka Rosey La Rouge) is a costume designer with a passion for burlesque. Her first book, The Pastie Project*, focused on that specialty adornment unique to burlesque. This tome shows everything.
It’s a chronological look at burlesque costumes from the 19th century until the present day, with each chapter spanning a couple of decades. Every chapter is illustrated with images of burlesque performers in costume and color photographs of extant costumes. The absolute best part is that Scott shows you all the layers when possible. It’s one of the challenges of displaying burlesque costumes (as I well know from mounting exhibits at the American Burlesque Collection), seeing only one part in isolation does not give you a full appreciation for the design of these costumes.
There are not a lot of extant early burlesque costumes, so she fills out the first chapter with images of performers and existing costumes for similar performances — ballet, cancan, circus, bellydance, Loie Fuller. As the chapters progress, more and more extant costumes are included (many from the collection of Nez Kendal) and we get to see details, sometimes even the insides. Still, photos of performers, posters, and other ephemera probably outweigh costumes. She touches briefly on a variety of costume styles, like half-and half acts and drag.
The very last chapter — Modern Burlesque Costume Design — features layer by layer photos. Dirty Martini, Cheeky Lane, Gin Minsky, and Darlinda Just Darlinda wear their costumes and strip for the camera, showing every piece as they go from full ensemble to pasties. They’re each on a plain white background which highlights the costumes in a way that’s impossible on stage. There are also close looks at individual components. It’s probably the best view of each costume possible, short of having the owner show it off in person.
[Please note that while most of Gin Minsky’s quick-change costume was made by Garo Sparo, her Screen Siren G-string was created by Manuge et Toi Designs and the blue gown was rhinestoned by Canova Studio, who were not credited. I’ll assume that was an oversight.]
It’s a lovely book to just flip through and look at the gorgeous photographs, but the text is enlightening too. There are interviews with Legends, current performers, and costume designers. There are notes at the end of each chapter and a bibliography in the back. Throughout the book words in red can be found in a helpful glossary of terms for those unfamiliar with burlesque and its specialized language.
It’s impossible for one book to be completely comprehensive on any topic, and there are, of course, omissions, but Scott covers a lot of ground and has created a beautiful work. It’s not inexpensive, even in softcover, but worth it.

*Which I don’t own…
These writings and other creative projects are supported by my 14 Patrons. Thank you so much! To become a Patron, go to my Patreon page. Or you can just tip me if you liked this.
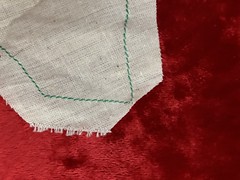 Corners: cut diagonally across the corner above the point
 Concave curves: cut little slashes up to the stitch line
 Convex curves: cut little wedges out of the seam allowance.


 These writings and other creative projects are supported by my 12 Patrons. Thank you so much! To become a Patron, go to
