Dear Constant Reader,
One of my sources of inspiration and creativity this winter has been Christine McConnell. As a Patron of hers, I get access to exclusive content and in November that was how to make the coffin-shaped gift box she packaged her aprons in.
Betty Blaize, although she famously doesn’t enjoy cooking, has been spending more time in her kitchen, cooking healthy food, so an apron sounded like a way to encourage her culinary efforts. I ordered her a cute one, but then I got an email that the seller canceled the order (it’s complicated). I panicked a little as it was getting close to Christmas, but Scratch pointed out that I could whip up an apron in no time flat. I found some cute pink cotton with big white polka dots and made her a chef-style apron that could actually be worn and washed without fear (and has pockets). Of course, the cute apron wasn’t actually cancelled and arrived the next day, so she got both.
Back to the box. I used the template pattern Christine provided Patrons at my level, which made things go much faster. I ended up using FOUR different kinds of glue on this project — spray adhesive, fabric glue, hot glue, and a glue stick. I’ll probably never work with spray adhesive again. I thought it would be easier and more accurate, but it was so messy. Since I wanted to keep the spray adhesive far away from Albert, I took everything into the basement and set up on top of the laundry machines. Not an ideal work environment, but needs must. Part way though I bemoaned the third-grade craft project look of the box and decided to give up. Scratch convinced me to see it through. And he was right. Once I starting decorating it, it began to look more polished.
 I covered the outside of the box in pink satin and lined it with the same polka dot fabric I used for the apron. I had *just enough* of the polka dot fabric to line the box, but that meant I had to use a piece with a stain on it. I couldn’t gift it looking like that, so I glued a couple of white lace butterflies over the offending spot.
I trimmed it all with two styles of black lace, some black lace appliqués, and both pink and black ribbon. I had to buy the pink satin for the exterior and the narrow pink ribbon that covers the seams, but everything else came out of my stash. My only regret was that I couldn’t find the black silk roses I know are hiding somewhere in my atelier.
One of the finishing touches is to add a drop shadow behind the cut-out on the lid. I got a piece of black posterboard to make the shadow and discovered it was bright orange on the reverse! It was also too small to cut out the entire shadow, which serves to finish the inside of the lid. I glued the orange side to it a piece of larger white posterboard and cut the whole thing out as one. A little black Sharpie was needed to touch up one spot where I miscalculated the alignment, but you can’t even tell.
The final step was to add a window of thin acrylic, which makes the box more finished-looking and strengthens the lid. I could not find a piece of acrylic both thin enough and large enough at any store. I was starting to get concerned when I found a cheap poster frame lurking behind the door of the library at the Manor. Whatever purpose it was supposed to serve before, it was a coffin widow now. The edges were just a bit raggedy in places after I cut it (I probably should have changed blades in my utility knife at that point), so after I glued it in place, I went around the perimeter with cloth tape. It looks nicer and there’s no chance of damage (to the window or a person).
And voila! The final product!

You can get a closer look with this little video. I’m still learning iMovie, so I’m grateful to Scratch for editing help.
I’m very pleased with how it came out and I hope Betty is happy with it!
 These writings and other creative projects are supported by my Patrons. Thank you so much! To become a Patron, go to my Patreon page. Or you can just tip me if you liked this.

 Secure your bead fringe.
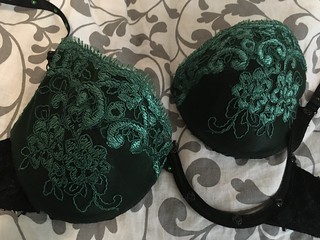 When making tear-away cup bras, use two bras.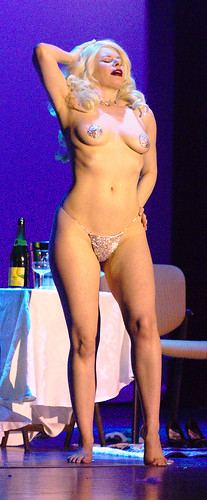



 I looked all over for a blouse with the right look and just found nothing. I ended up grabbing the blouse from my “Li’l Red Riding Hood” act, but while it has the right shape, it’s a sturdy white cotton and didn’t blend so well with the lacy skirt. Fortunately, I still had some of the two kinds of lace I used to make the skirt. I used it to make a big collar, like Gypsy had in some iterations of her costume. It helped tie things together, and since it was just pinned in place, I can easily transfer it to a more appropriate blouse once I find or make one.

 Photos by Sarah Kietzman
 Make your own bias tape.
 A little wax can smooth your way.
 You can see the female snap on the cup and the male snap on the frame. It’s exactly the reverse on the other side. It’s impossible to snap a cup onto the wrong side!
 When encrusting your pasties with rhinestones, use a metallic base fabric for extra sparkle.
 The bra is a Frederick’s of Hollywood Exxtreme Cleavage push-up. It’s so “exxtreme” that I had to take out the push-up pads. For the fan dance I took off the (removable) straps, but for this act, I put the straps back on and adorned them with large black diamond rhinestones. Despite all my tricks, a couple of stones decided to pop off every time I wore it. I think I finally solved the issue.
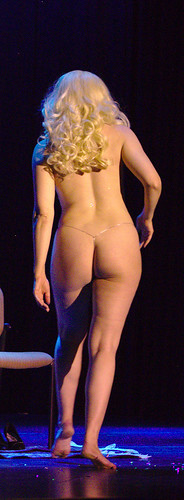
 The belt is styled after a bellydance hip belt. I love the deep V-shape. I also like how wide it is, that it’s a substantial costume piece, which makes for a nice reveal when it comes off. The only problem with that shape is that the point of the V can roll up. To keep the front nice and flat, I added a piece of boning inside. That does mean if I’m not careful, the whole thing can flip up. Embarrassing!
 The G-string is based on the pattern from my
  Cutting the panels wasn’t too bad. I’m very lucky that Albert isn’t one of those cats who needs to sprawl on fabric. It was hemming them that was going to be a problem. I wanted a tiny rolled hem and I usually do those by hand. A rolled hem is a thing of beauty, but it’s slow going. I had an awful lot of hem and not a lot of time. Fortunately I have a narrow hem foot on my
 Here’s the tricky part. I decided I needed some bad-ass shoes for the number. My character shoes are too cute; ballroom shoes are too dainty. I really wanted to use the shoes at the right, hand-me-downs from Angie Pontani. I’ve wore them on stage before, but not when I was dancing. I was committed to those shoes, because the panels were hemmed for a 5-inch heel. Even with the shoes on, the panels still touched the floor. I really didn’t want to use a lower heel and risk tripping over them. And I was having problems with the shoes… but more about that later.
 Oh, The Glamourous Life!

